
Overview
This guide shows you how to install your ConnectLoop AI agent on a Wix website using the built-in Custom Code feature.
No coding experience is required. This method works across all Wix sites.
Prerequisites
Before you begin, make sure you have:
- Access to your Wix site dashboard
- Your ConnectLoop embed code, e.g.:
<script
  src="https://agents.connectloop.ai/widget.js"
  data-company-id="your-company-id">
</script>
Get your ConnectLoop embed code
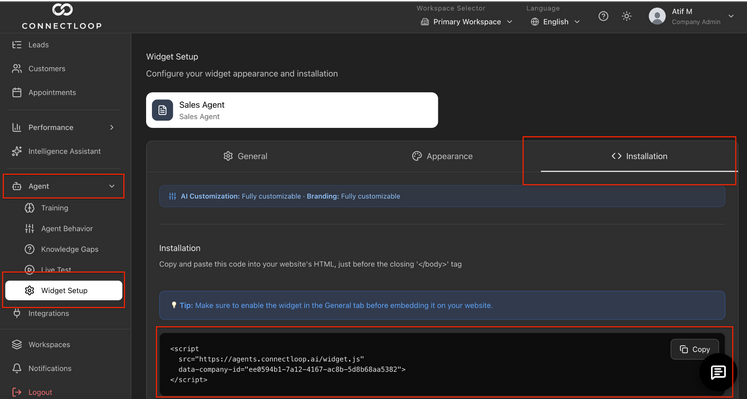
Step 1: Open Your Wix Dashboard
Log in to your Wix account.
- If you only have one site, you will be taken directly to its dashboard and can continue to Step 2.
- If you have multiple sites, you will be directed to the Sites page. From there:
- Select the correct site (the one where you want to add the agent)
- Click on it to open its dashboard
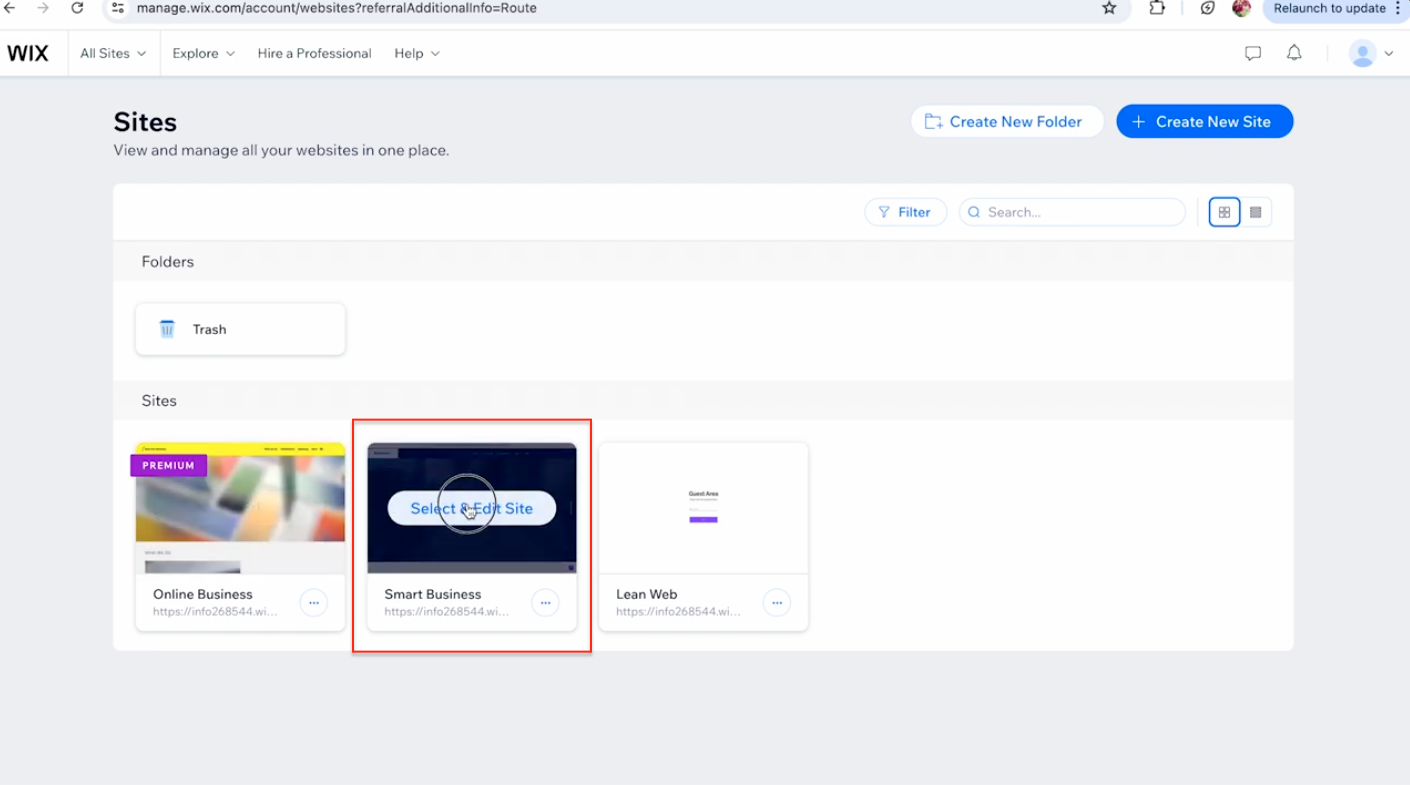
Step 2: Go to Custom Code Settings
Inside your dashboard:
- Click Settings
- Scroll to Advanced Settings
- Click Custom Code
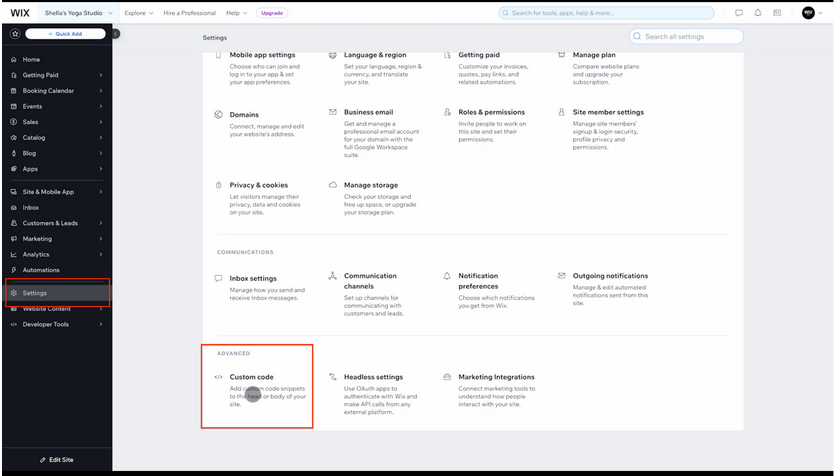
Step 3: Add a New Custom Code Snippet
- Click + Add Code in the Head section.
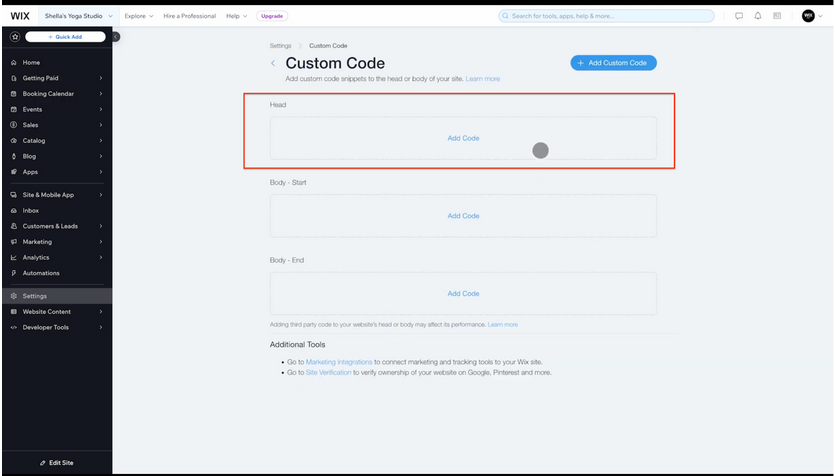
Step 4: Add Your ConnectLoop Code
In the custom code panel:
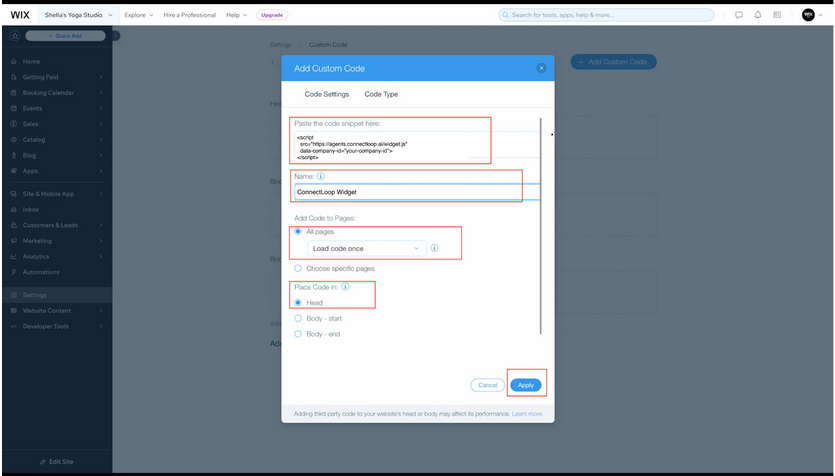
- Paste your full ConnectLoop embed code into the text box.
- Enter a name, e.g.: ConnectLoop Widget
Make sure you paste the entire code exactly as provided and do not modify it.
Step 5: Configure Where the Code Loads
Set the following options:
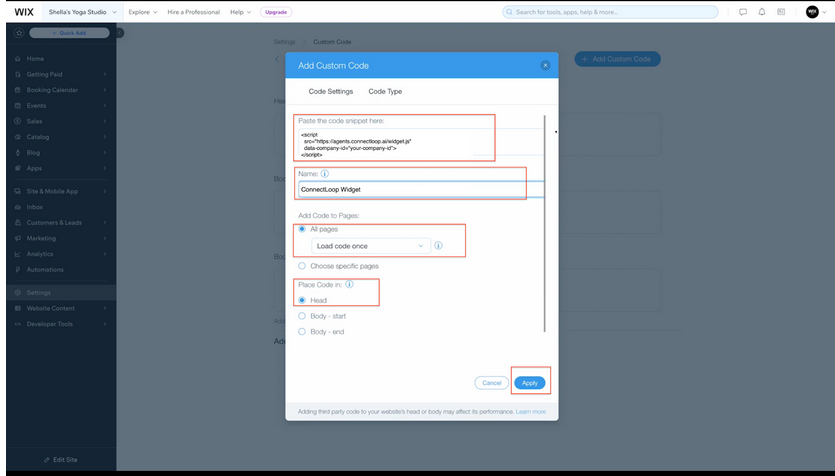
- Add Code to Pages: Select All pages
- Load Code: Select Load once per visit
- Place Code In: Select Head
Step 6: Apply and Save
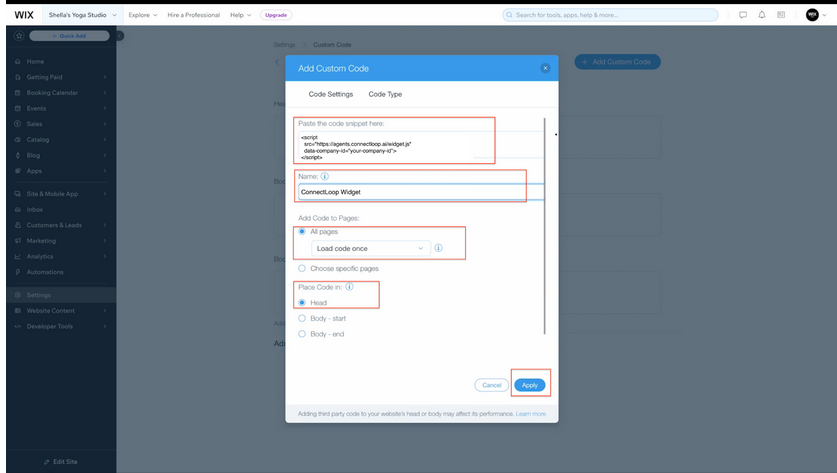
- Click Apply.
Step 7: Verify Installation
- Open your website in a new tab
- Refresh the page
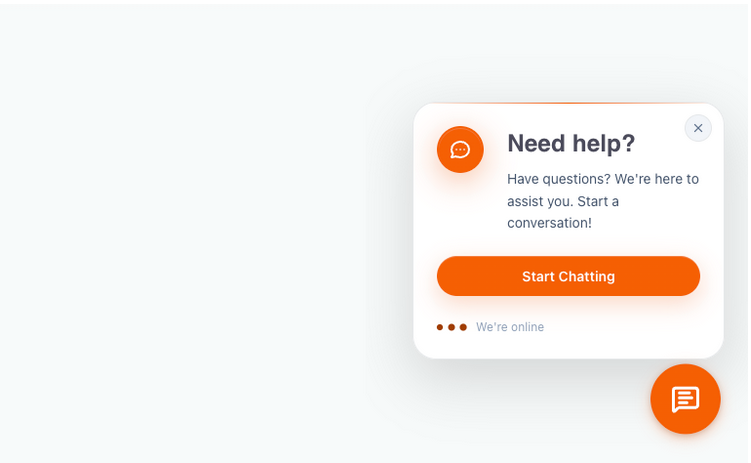
You should now see your ConnectLoop widget appear on your site.
What Success Looks Like
- The widget appears on your website
- You can open it and start a conversation
- Leads and conversations begin appearing in your ConnectLoop dashboard
Common Issues & Fixes
The widget is not showing
Check the following:
- The code is pasted correctly and completely
- You selected All pages
- You placed the code in the Head section
- Your site is published
- You are viewing the live site, not the editor
Changes are not appearing
This is usually because the site was not published:
- Click Publish in Wix
- Refresh your website
Important Notes
- Your site must be published and connected to a domain for custom code to work
- Custom code is not visible inside the Wix editor, only on the live site
- Wix does not provide support for third-party code snippets
- You only need to install this once
Need Help?
If you run into any issues, try chatting with our guide agent inside the portal. You can also reach out to our support team at [email protected], and we'll help you get everything set up.
If you need more detailed guidance on using Wix custom code, you can also refer to: