
Overview
This guide shows you how to install your ConnectLoop AI agent on a WordPress website using the Code Snippets plugin. No coding experience is required.
This method works across all themes and page builders.
Prerequisites
Before you begin, make sure you have:
- Access to your website's HTML file or template editor
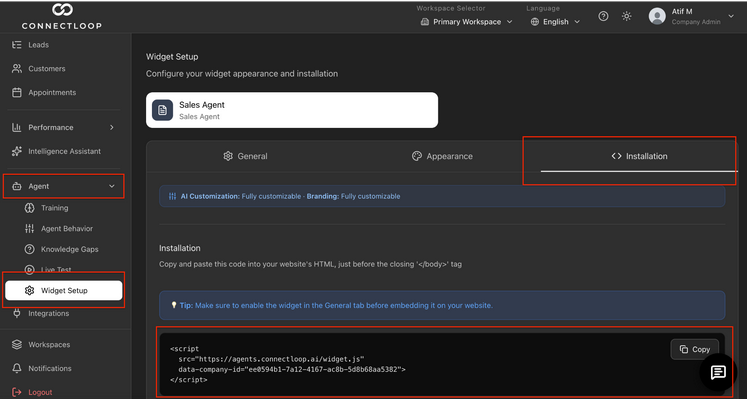
- Your ConnectLoop embed code, e.g.:
<script
  src="https://agents.connectloop.ai/widget.js"
  data-company-id="your-company-id">
</script>
Get your ConnectLoop embed code
Step 1: Log in to WordPress
Go to your WordPress admin panel:
yourwebsite.com/wp-admin
Enter your login details and access your dashboard.
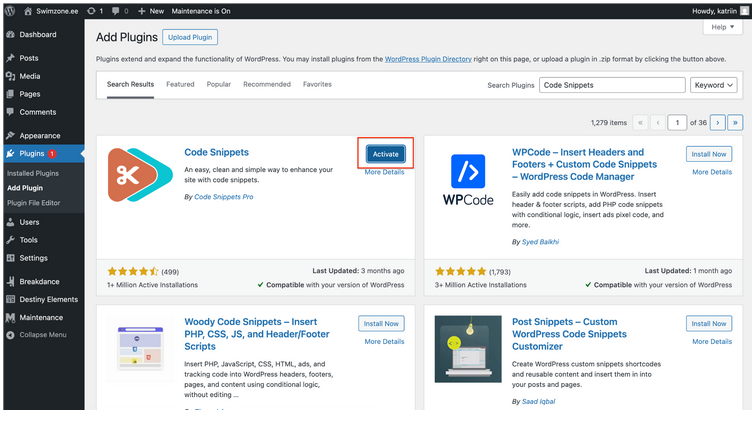
Step 2: Install the Code Snippets Plugin
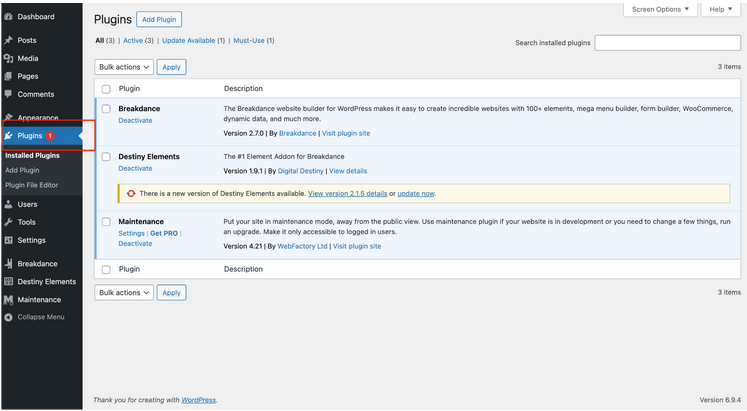
- In the left sidebar, click Plugins.
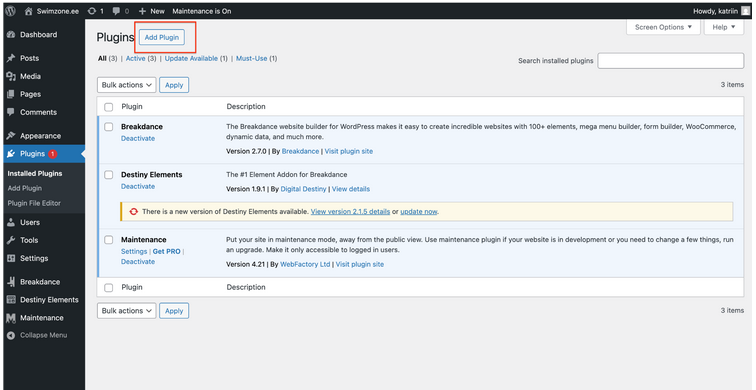
- Click Add Plugin.
-
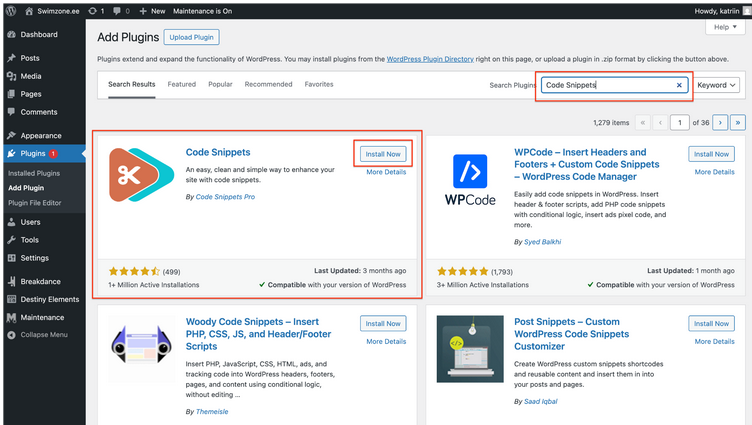
In the search bar, type: Code Snippets.
-
Find the plugin and click Install Now.
- Click Activate.
Step 3: Create a New Snippet
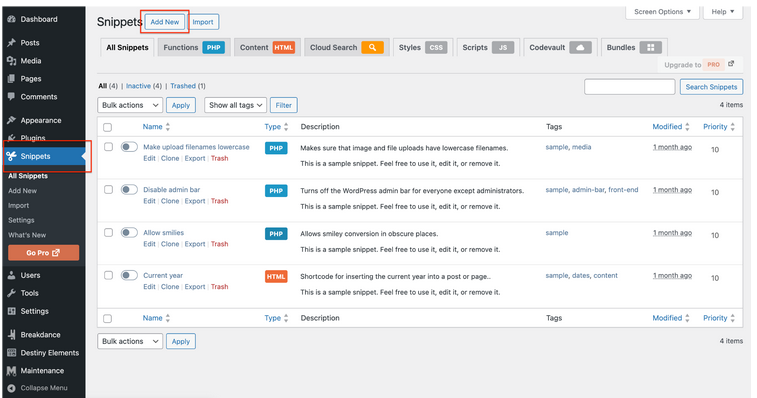
- In the left sidebar, click Snippets.
- Click Add New.
Step 4: Add Your ConnectLoop Code
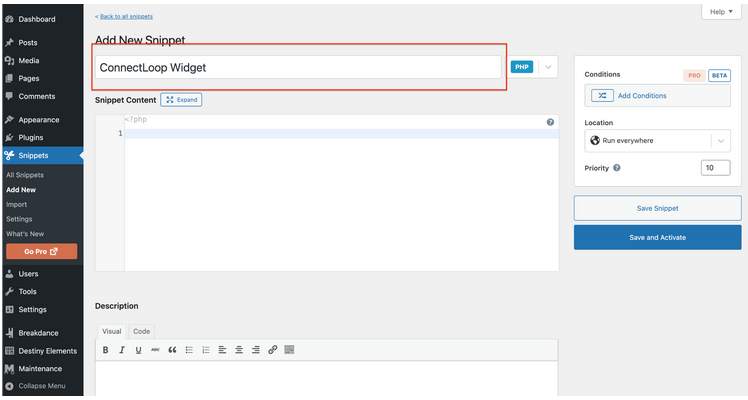
Fill in the snippet details:
- Title: ConnectLoop Widget
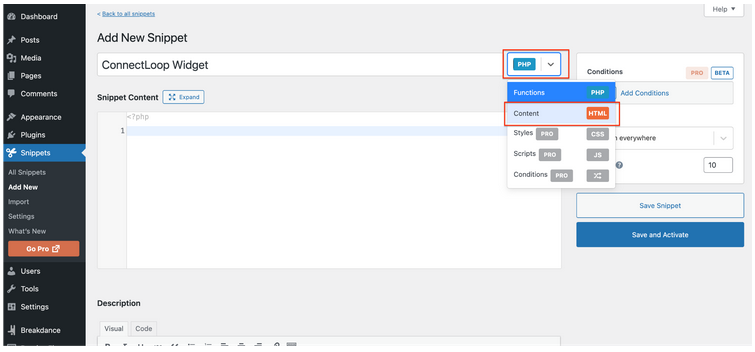
- Code Type: Select HTML
- Snippet Content: Paste your full ConnectLoop embed code
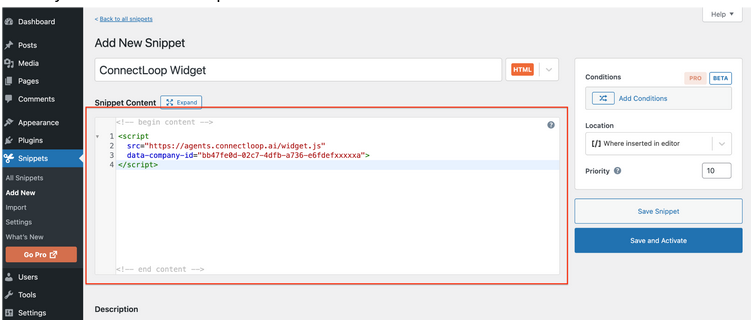
Make sure you paste the entire code exactly as provided and do not modify it.
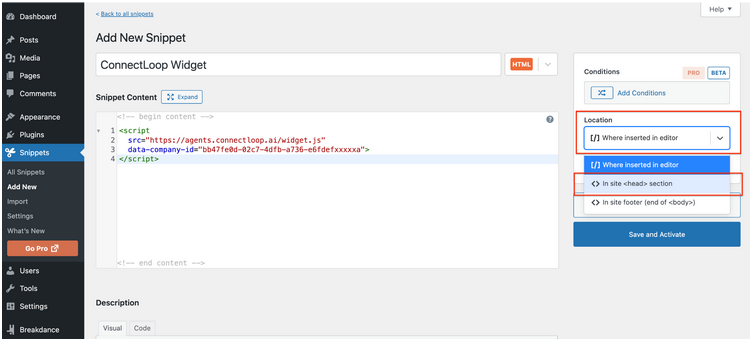
Step 5: Set Where the Code Loads
Find the Location setting and select:
- In site
<head>section
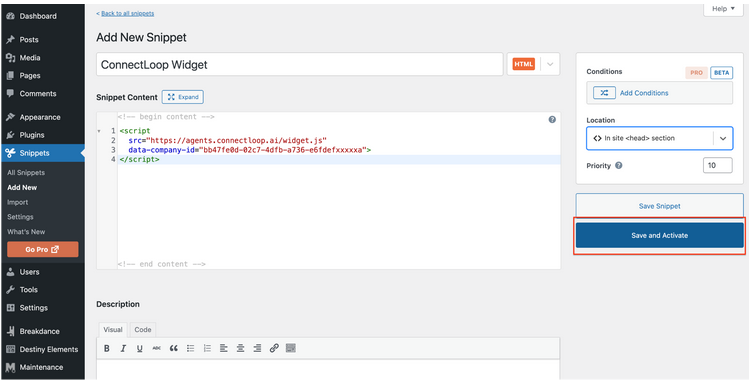
Step 6: Save and Activate
- Click Save and Activate.
Step 7: Verify Installation
- Open your website in a new tab
- Refresh the page
You should now see your ConnectLoop widget appear on your site.
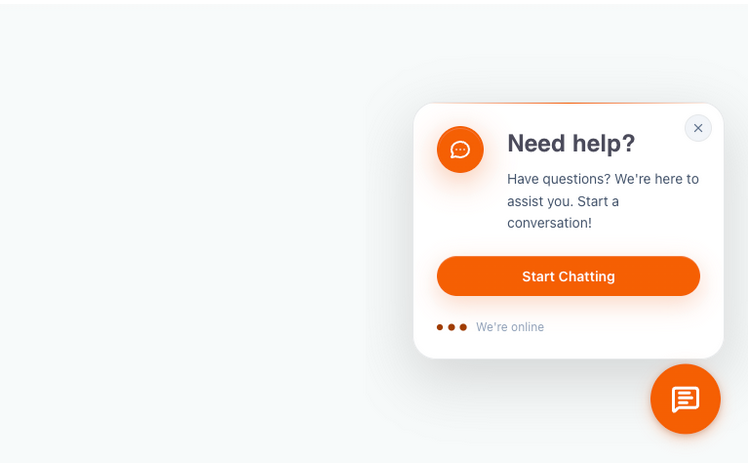
What Success Looks Like
- The widget appears on your website
- You can open it and start a conversation
- Leads and conversations begin appearing in your ConnectLoop dashboard
Common Issues & Fixes
The widget is not showing
Check the following:
- The snippet is saved and activated
- The correct location (Header) is selected
- Your website cache is cleared
- You are viewing the live site, not preview mode
Changes are not appearing
This is usually caused by caching:
- Clear your website cache
- Try opening your site in an incognito window
Important Notes
- You only need to install this once
- This method works across all WordPress themes and builders
- No coding knowledge is required
Need Help?
If you run into any issues, try chatting with our guide agent inside the portal. You can also reach out to our support team at [email protected], and we'll help you get everything set up.